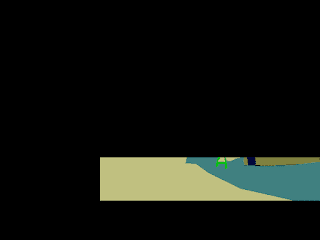
졸업작품의 데이터셋이 너무 작아 Augmentation을 주어 크기를 키워 훈련 효율을 늘려야 하는 상황에 봉착했다. 또한 나무처럼 정확하게 구간을 정하기 힘든 라벨들이 회귀에 어려움을 주고 있었다.
우리 프로젝트는 도로 인식이 주 목표이기 때문에 데이터 이미지의 하단부분만 잘라내어 사용하기로 계획을 변경했다. 또한 Augmentation으로 데이터셋을 확장하기 위해 잘라낸 부분을 다시 여러 각도로 돌렸다.
Labelme의 어떤 이미지 파일에 대한 Label JSON 구조는 다음과 같다.
{
  "version": "4.5.9",
  "flags": {},
  "shapes": [
    {
      "label": "_background_",
      "points": [
        [
          200,
          315
        ],
        [
          200,
          400
        ],
        [
          639,
          400
        ],
        [
          639,
          315
        ]
      ],
      "group_id": null,
      "shape_type": "polygon",
      "flags": {}
    }, ...],
  "imagePath": "1_taken-00720.jpg",
  "imageData": "BLOB 데이터",
  "imageHeight": 480,
  "imageWidth": 640
}def crop_process_labelme(path: str, x1: float, y1: float, x2: float, y2: float):
'''
path - Directory that contains labelme JSONs
x1 - the cropping point of left top width from image
y1 - the cropping point of left top height from image
x2 - the cropping point of bottom right width from image
y2 - the cropping point of bottom right height from image
'''
processed_dir = os.path.join(path, 'processed')
paths = glob(os.path.join(path, '*.json'))
if not os.path.exists(processed_dir):
os.mkdir(processed_dir)
for path in paths:
with open(path, 'r') as f:
print('Processing : ', os.path.basename(path))
tmp = json.load(f)
i = 0
while True:
try:
shape = tmp['shapes'][i]
min_x = tmp['imageWidth'] + 1
max_x = -1
min_y = tmp['imageHeight'] + 1
max_y = -1
points = shape['points']
for point in points:
min_x = min(point[0], min_x)
max_x = max(point[0], max_x)
min_y = min(point[1], min_y)
max_y = max(point[1], max_y)
left = (x1 - max_x) > 0
right = (x2 - min_x) > 0
top = (y1 - max_y) > 0
bottom = (y2 - min_y) > 0
if top and bottom or left and right:
# if every points of a shape is out of cutting range,
# then it will not appear in a cropped picture. we don't need this.
print(tmp['shapes'][i]['label'], max_x, min_x, max_y, min_y)
del tmp['shapes'][i]
else:
print('Cliping : ', i)
for point in points:
# Clipping points
if int(point[0]) >= x2:
point[0] = x2
if int(point[1]) >= y2:
point[1] = y2
if int(point[0]) <= x1:
point[0] = x1
if int(point[1]) <= y1:
point[1] = y1
i += 1
except IndexError:
break
with open(os.path.join(processed_dir, os.path.basename(path)), 'w') as f:
json.dump(tmp, f, indent=2)
Labelme가 제공하는 VOC 데이터셋 생성하는 스크립트는 JSON 안에 있는 이미지 메타데이터(imageData, imageHeight, imageWidth)를 이용하여 Label을 생성한다. 그래서 다음과 같이 원래 이미지의 해상도에서, 자른 구간만이 포함된 label 이미지가 생성된다.
 |
| 새롭게 나온 Label |
def crop_image_voc(path: str, x1: float, y1: float, x2: float, y2: float):
    '''
    path - VOC Dataset root dir that generated by labelme2voc
    x1 - the point of left top width from image
    y1 - the point of left top height from image
    x2 - the point of bottom right width from image
    y2 - the point of bottom right height from image
    '''
    processed_dir = os.path.join(path, 'processed')
    filenames = glob(os.path.join(path, 'SegmentationClassPNG', '*.png'))
    filenames.extend(glob(os.path.join(path, 'JPEGImages', '*.jpg')))
    img = None

    if not os.path.exists(processed_dir):
        os.mkdir(processed_dir)

    for filename in filenames:
        category = os.path.split(os.path.split(filename)[0])[-1]
        if not os.path.exists(os.path.join(processed_dir, category)):
            os.mkdir(os.path.join(processed_dir, category))

        img = Image.open(filename)
        img = img.crop((x1, y1, x2, y2))
        img.save(os.path.join(os.path.join(processed_dir, category), os.path.basename(filename)))
def rotate_images_voc(path: str, angles: list):
    '''
    path - VOC Dataset root dir that generated by labelme2voc
    angles - degrees of image rotation
    '''
    def rotate_image_cv2(image, angle, flag):
        # https://stackoverflow.com/questions/9041681/opencv-python-rotate-image-by-x-degrees-around-specific-point

        image_center = tuple(np.array(image.shape[1::-1]) / 2)
        rot_mat = cv2.getRotationMatrix2D(image_center, angle, 1.0)
        result = cv2.warpAffine(image, rot_mat, image.shape[1::-1], flags=flag)
        return result

    label_root = os.path.join(path, 'SegmentationClassPNG')
    image_root = os.path.join(path, 'JPEGImages')

    label_processed_dir = os.path.join(label_root, 'processed')
    image_processed_dir = os.path.join(image_root, 'processed')

    if not os.path.exists(label_processed_dir):
    	os.mkdir(label_processed_dir)
    if not os.path.exists(image_processed_dir):
    	os.mkdir(image_processed_dir)

    labels = glob(os.path.join(label_root, '*.png'))
    images = glob(os.path.join(image_root, '*.jpg'))

    for path in labels:
        for a in angles:
            lbl = Image.open(path).convert("P")
            palette = lbl.getpalette()
            lbl = np.array(lbl)
            rotated_lbl = rotate_image_cv2(lbl, a, cv2.INTER_NEAREST)

            new_name = os.path.basename(path).split('.')
            new_name[0] = new_name[0] + '_' + str(a)
            new_name = '.'.join(new_name)

            rotated_lbl = Image.fromarray(rotated_lbl)
            rotated_lbl = rotated_lbl.convert("P")
            rotated_lbl.putpalette(palette)

            rotated_lbl.save(os.path.join(label_processed_dir, new_name))

    for path in images:
        for a in angles:
            img = cv2.imread(path)
            rotated_img = rotate_image_cv2(img, a, cv2.INTER_LINEAR)

            new_name = os.path.basename(path).split('.')
            new_name[0] = new_name[0] + '_' + str(a)
            new_name = '.'.join(new_name)

            cv2.imwrite(os.path.join(image_processed_dir, new_name), rotated_img)
혹여나 회전하면서 생기는 검은 뒷배경이 나오지 않도록, 회전 후 이미지의 중앙 부분만을 잘라서 저장하는 방법이 필요로 하다면 다음 링크를 참고하면 될 것 같다.


댓글 없음:
댓글 쓰기